
On any given sailboat, there are at least 2 or 3 winches and on larger boats, there can be many more. I have 6 on my 41-foot sloop and one is a powered winch.
At upwards of $6,000 or more per winch, keeping them functioning reliably is as much of a financial necessity as an operational one.
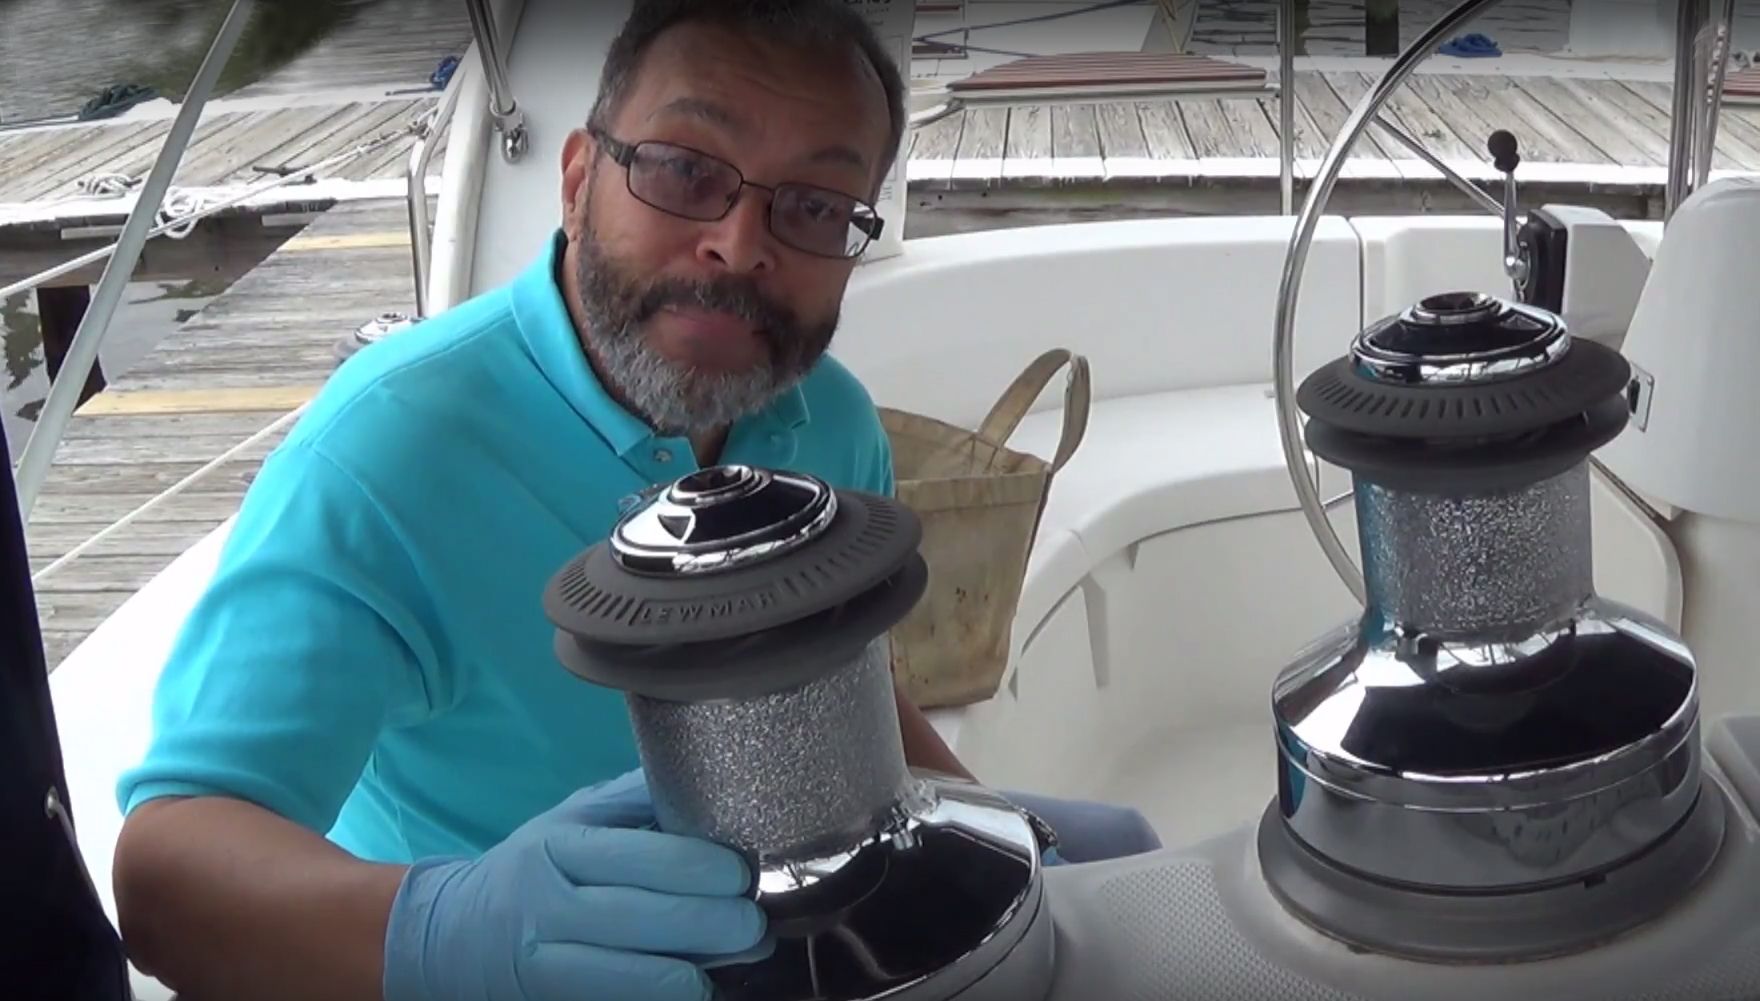
Here’s a step-by-step overview for servicing a two-speed winch on a sailboat… including a full how-to video showing how I serviced my starboard jib winch.
Mechanical Advantage
Whether you are raising a sail, trimming a sail, hauling crew up the mast on a halyard, or maybe adjusting a spring line used to raft up with another boat, you use a winch for the mechanical advantage it provides in handling a given load. That is, raising a sail that weighs 100 pounds may only need about 25 pounds of force when cranking the winch.
 That mechanical advantage comes from the gear ratios used in the various gear clusters built into the winch. Very simply, the gear ratio is the number of teeth on one gear divided by the number of teeth in the gear which turns the first.
The high speed gear ratio may be 3:1, for example, while the low speed ratio could be 10:1. (That is, it takes less force to turn using the low speed gears but you have to crank the winch handle more times than with the high speed gears.) These are just examples and the specifics of your winch may vary.
The effort required to crank a winch under load depends on several factors including drum size, length of the winch handle, gear ratios, and friction from all the fairleads and turning blocks on the line in use. In a simplistic example assuming no friction, raising a 100 pound load with a gear ratio of 10:1 requires 10 pounds of force.
Speaking of friction, it may also be introduced by worn winch gears and grit and dirt in the internal workings. That, as much as anything else, is a reason to service your winches.
Servicing a Sailboat Winch
Performing winch maintenance on your sailboat is simply disassembling the winch, inspecting and cleaning the parts, then lubricating and reassembling the unit. You may or may not have to replace parts but at a minimum, one should replace the pawl springs as described below.
Before you begin and especially if this your first time doing this, I recommend you find a box bigger than the base of your winch. Then cut a hole in the bottom so you can slip the box over the winch. Try to tape the box in place so it can’t move but also so that removing the winch drum is not compromised.
The purpose of the box is to catch and contain any parts that might fall out of the winch unexpectedly. This is especially true for winches that sit on a coaming or near the gun’l. It would be at least an annoyance to have to go buy replacement parts that dropped overboard assuming you know what parts you may have lost.
In addition to the suggested containment box, you will want to have:
- a set of dental probes
- one or more toothbrushes
- a basin of some sort
- some solvent with which to degrease and clean the parts
Some people suggest using kerosene or gasoline. I think those are much too volatile to use for this purpose. I use paint thinner and it works just fine.
You will likely want to spread some newspaper and/or a plastic drop cloth to protect the fiberglass and other materials in the area in which you are working. Knowing that I will be immersing parts into a solvent, I like to wear nitrile gloves to protect my hands.
The first step is to unscrew the top cap. You will probably need a screw driver and hammer to tap lightly on the cap to loosen it and then finish by unscrewing by hand. Briefly inspect each part as it comes off and then place the parts into a secure container. Note that you may want to have a separate container or basin with the solvent in it.

With slight variation depending on make and model, the disassembly steps are:
- Loosen and unscrew the top cap
- Remove the stripper arm
- Remove the drum
- Remove the roller bearings, spacer, and bottom fender washer
- Remove the axle pins and gear clusters at the base
- Remove the keyed retainer clips at the top
- Remove the central shaft
You may wish to photograph each step and each part as the disassembly progresses.

Next you will clean each part in the solvent, using the dental picks to clean any solid clumps or gummy residue. Much like a dentist does, use the probe to feel for pits, accumulations, or other defects. Clean what you can and determine if a given part needs to be replaced due to wear or defect.

 As you finish each part, set it aside in a clean dry container. Also be sure to wipe down and clean the bronze structure left bolted to the boat. Pay particular attention to areas around where the gear clusters are seated.
The gear clusters are each a set of two gears, one rotating inside another with a pair of pawls that allow the gears to only spin in one direction. Be sure to clean both gears and all the recesses.
Replacing Pawl Springs

Particularly check the pawls for defects. The pawls are what keep the winch from back-spinning under load. They are essential and must be up to the task.
The “springs” are little more than stiff wire bent into a V-shape with a loop at the apex for a spring force.
It is not worth reusing them. Springs can be had inexpensively. Just replace them when you reassemble the winch.
Reassembling the Winch
When all the parts are well cleaned and the solvent has been wiped away or evaporated, you may begin reassembly. Each part should be adequately but not excessively lubricated. Over-lubing promotes clumping and the accumulation of grit and salt particles.
The only exception to lubrication is the O-ring under the stripper arm. Some O-rings may not tolerate grease well and they really do not need grease for their sealing function.
Start by slipping the pawl springs into the notch on the pawl. Then slide the pawl into its gear until the spring stops it. Compress the spring to allow the pawl to slip into its socket all the way. Some technicians recommend lubing the pawls with oil instead of grease so they do not stick. There are also light winch greases which can be applied in a very thin coat. There should not be gobs of grease anywhere, just a coating.
Next slide the (smaller) gear with the pawls into the (larger) mating gear. Make sure the inner gear turns as expected.
Install the gear clusters first, being mindful of the correct orientation. When both clusters have been installed, spin them to verify smooth and even rotation. Now replace the fender washer, one roller bearing, the spacer, and then the second roller bearing in that order. Next insert the central shaft and the keyed retainer clips.
Slip the winch drum over the entire assembly. Reinstall the O-ring on the stripper arm position it as desired while meshing with the keyed retainer clips. Finally screw on the top cap finger tight. And you’re done!
Your winch should give you many years of service with this simple maintenance procedure. While racing boats may service their equipment after every race or practice, cruisers can reasonably service their winches at intervals of a couple of years OR until one detects unusual resistance or operation. Should the latter happen, don’t wait to service the winch or you risk more serious damage or even personal injury.
I enjoy performing as much of my own maintenance when I can. It helps me stay in touch with my boat and it gives me more reason to be aboard!
Video How-to: Performing Winch Maintenance
Watch the video below to see how I serviced my starboard jib winch.
Subscribe to my YouTube Channel for more how-to videos, sailing excursions and more!
Love the boat life? Check out these picks for your boating lifestyle:


Disclosure: This site may contain links affiliated with companies where we receive compensation. Also, as an Amazon Associate we may earn from qualifying purchases we refer but it does not impact the price you pay. Full disclosure policy.